Customizing your URL links and creating link redirects might seem like a small thing, but it has a huge impact on your SEO!
Custom URLs tell Google (and other search engines) what that specific page is about by adding your target keywords to the URL of each page. Link redirects help you avoid broken links so Search Engines (and your website visitors) don’t land on a 404 Error page. This is what shows up when a link does not exist anymore or is incorrect aka broken.
Having a broken link tells Google that your website is not up to date and it gives visitors a bad user experience. Both of these are bad for SEO!
I am going to show you how to customize URL and how to create redirects on Showit.
Remember, if you update a URL to any page on your website you have to create a redirect for the old link. Otherwise, if anyone happens to land on that old link it’s going to show that 404 Error page. And you can be missing out on someone finding the correct page on your website.
When you have a link redirect set up, it basically means that the old link leads to the new link. So even if someone landed on that old link that’s deleted it will automatically redirect to the new page.
When Google is crawling your website it uses the internal links to find all of the pages you have on your site. If you haven’t correctly added redirects and Google is trying to crawl your website it might miss out on those pages. Which again, doesn’t help optimize those pages for SEO because Google won’t know they exist!
Showit makes it so easy to make these changes it’s going to blow your mind!

Get your Free ClickUp Content Calendar for Blogging
Not staying consistent with publishing your blog posts is the biggest mistake you can make if you want to increase organic traffic to your website.
As an online business owner you already know that you need to bring people to your website to sell your services. Unfortunately, most entrepreneurs make the mistake of investing thousands of dollars on launching a website without having a plan in place to get people to actually visit that website. The best way to get more people on your website is with a blog strategy. And without a content calendar you will struggle to consistently post your blog and miss out on the opportunity to attract hundreds of ideal clients.
That’s why I created this simple, easy to use content calendar on ClickUp. This is the exact template I use to schedule and write my blog posts so I stay consistent with my marketing and increase organic traffic to my website.

How to customize URL link on Showit
Log into your Showit design app. You will see all of your website pages listed on the left hand side. Each page has a name and this name is the specific URL for that page!
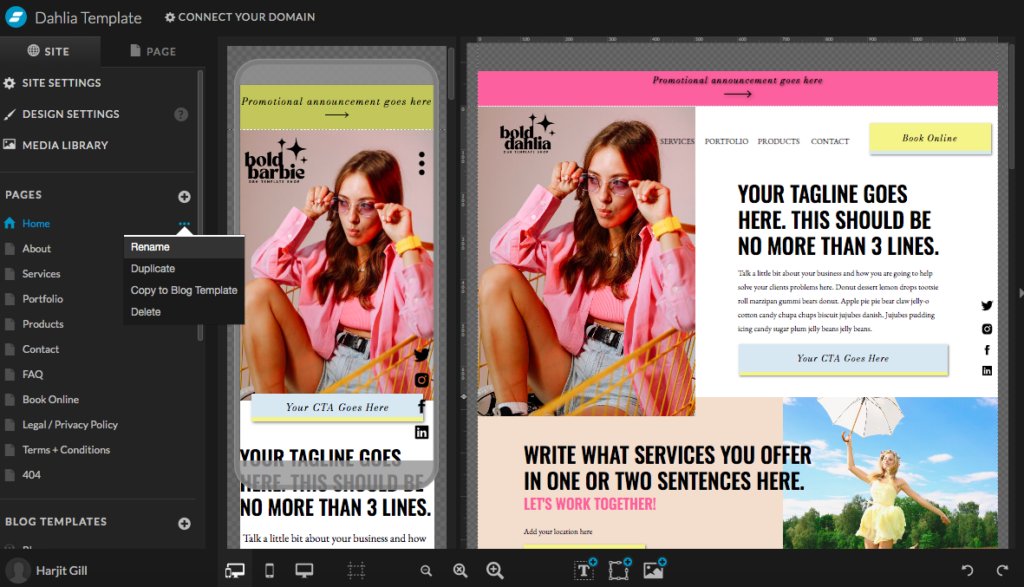
All you have to do is rename the title of each page to an SEO optimized URL and hit save! As you can see in the image below, you don’t even have to put dashes in between the words, it will automatically add them for you.
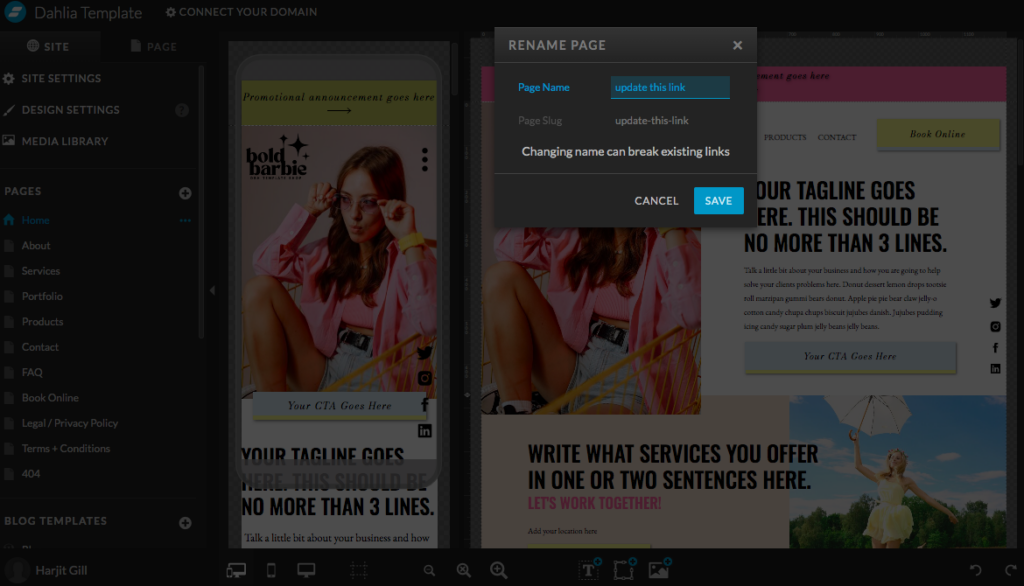
Once you have updated page URLs you will want to hit publish to see the changes on your live website.
Now it’s important to mention, when you update your page URLs it will break any links that are leading to the previous URL (the old title of that page). What I would recommend is to go through your website and relink any internal links you have leading to the pages you just updated. And then be sure to add a URL redirect!! This is so important because if there are any external websites leading to those old page URLs they will land on a 404 Error page. We don’t want to lose that traffic and we don’t want Google to ding you for this! And again, it’s super easy to set up URL redirects!
How to create URL Showit redirects
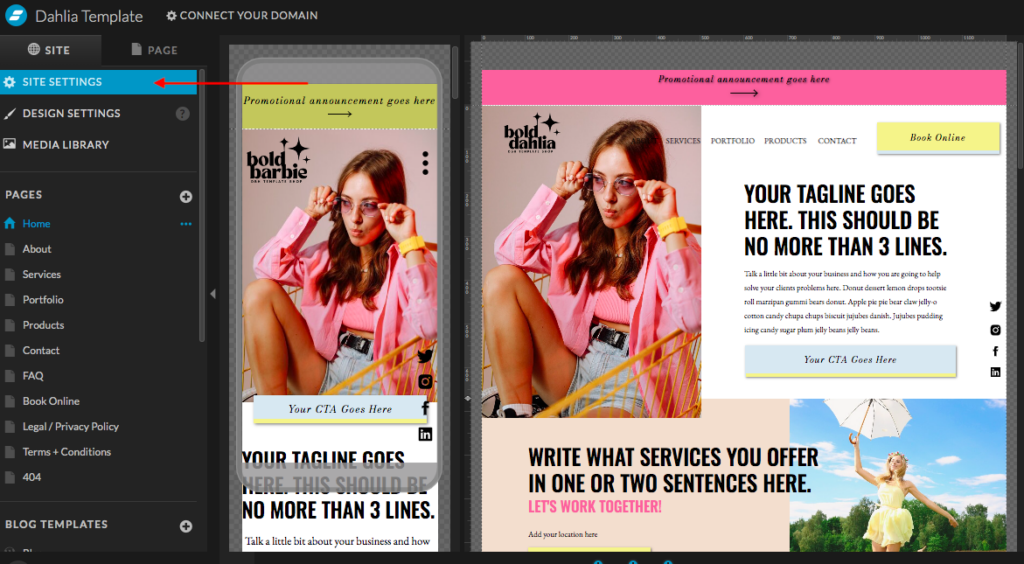
Once again, we are starting in your Showit design app. This time what you want to do is go into your Site Settings on the top left hand corner.
Click Edit next to your domain. Then select the little gear icon on the right.
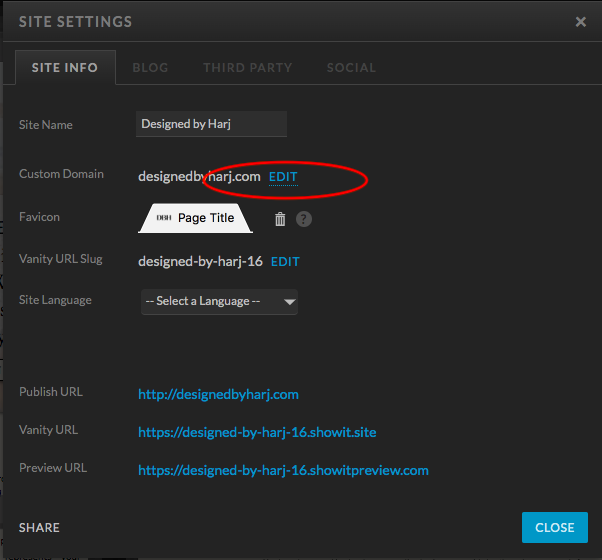
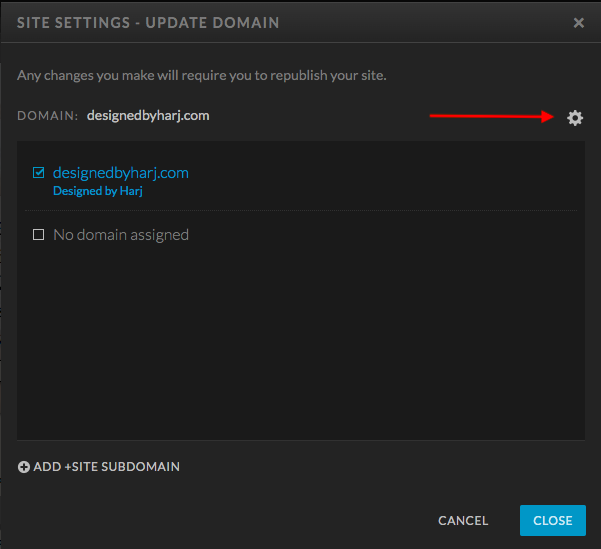
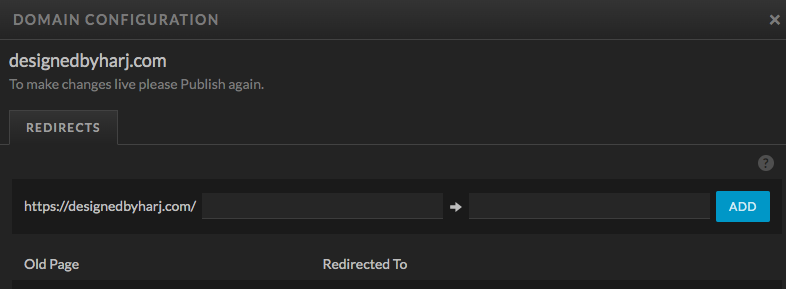
And this is where you will add your URL redirects!
- Simply add your old URL first (right after your domain name)
- Add your new URL right after the arrow
- Hit ADD
You will see your old link added under Old Page and your new link added under Redirected To. You can close and remember to publish to make the changes live.
And that’s it! So easy right!?
I love working with introverted entrepreneurs (like me!) who want to build a cozy business from the comfort of their couch! And the best way to do that is with an SEO optimized website and a solid blogging strategy!
If you have been thinking about optimizing your website for SEO or starting a blog for your business I would love to guide you in creating a strategy uniquely for your biz! Book a free consultation so we can bring your introverted lifestyle into your business!

You’ll also love…
How to Create Dropdown Menu on Showit Desktop Website
Why I love Blogging for Marketing
How to add Transition Effects on Showit Website
Blogging for your business: How to use SEO to grow your business
