


In this post I am going to show you how to create a dropdown accordion FAQ on website for Showit!
It’s so valuable to have an FAQ section on your website! These frequently asked questions can help you squash any worries a potential client may have. They also save you time because you can direct people to your FAQ to answer questions you’re getting regularly, so you don’t have to repeat yourself!
On Showit it can seem a little frustrating to create your FAQ accordion the first time you do it. But I promise, it’s not all that complicated! And after you create it once you can re-use the design you’ve already created and swap out the copy as needed!

Prefer to watch?
Here’s the video!
https://www.youtube.com/watch?v=IoEt5NbJYPc&t=3s

You know you need a website for your business but you have no idea where to start?
Don’t worry, I got you!
Sign up below to download your FREE Website Content Roadmap to get started!
How to create an FAQ accordion drop down on your Showit website
In order to create a drop down accordion we will be working with different canvases on Showit. Each question and answer will be listed on a different canvas. We will also use canvas views to swap out the icon from a down arrow to an up arrow.
Here’s the step by step guide!
Let’s start with adding the first question
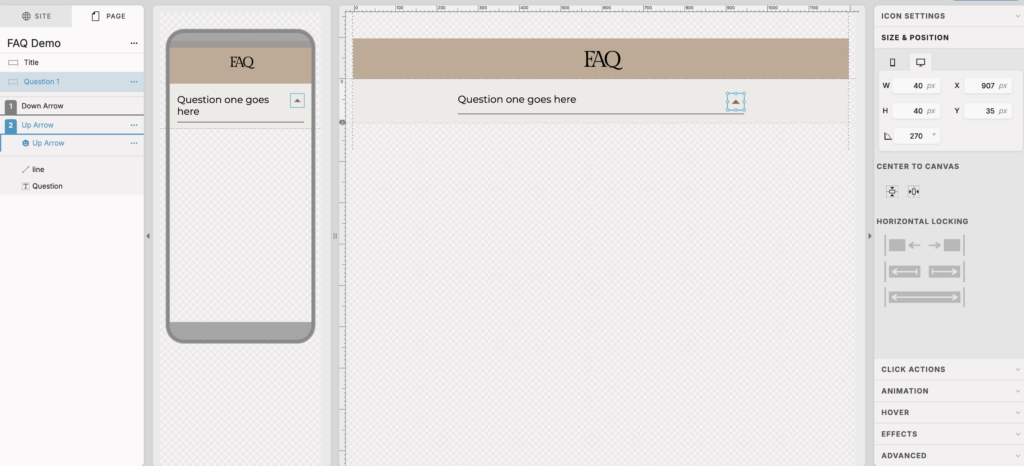
Start by adding a blank canvas and add a text box and icon. Copy and paste your first question into the text box and choose which icon you want to represent the drop down. Usually a down arrow is the best here so it’s very clear how the user can get the answer!
Size and style these to your preference. I like to name the Canvas so it corresponds with the question and answer we’re working with. For the first one, name your canvas “Question 1”.

Once you’ve created this canvas we want to create another canvas view. This is so we can have the first view with the arrow pointing down to show the answer. The second canvas view will have an arrow pointing up to close the answer canvas.
To do this:
- Select the three dots next to your canvas title
- Select add canvas view
- Hold and drag the down arrow icon into canvas view 1
- You can leave the question text box and line (if you’ve added one) outside of the canvas view. These will always remain the same so they do not need to go into a specific view.
- Then select the three dots next to View 1
- Select duplicate
- Change the direction the arrow points in so that it’s pointing upwards signaling to close the answer (which we will add in just a moment)
- I like to also name the views as “down arrow” and “up arrow”
Now let’s add the answer canvas
Add a new blank canvas and add a text box. Copy and paste your answer and then style to your preference. This part is pretty simple. Now we will go ahead and add some functionality to make it all work!
Adding functionality to your FAQ accordion drop down on Showit
Let’s start with the Question canvas again
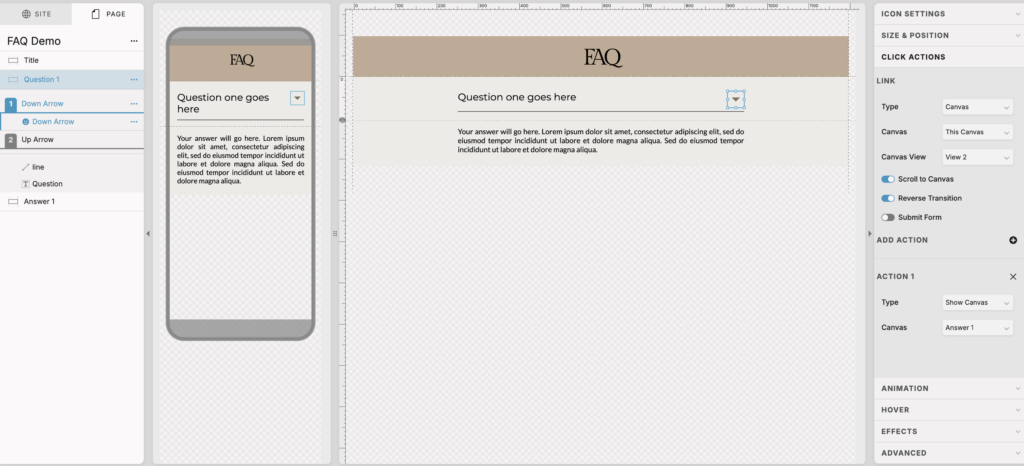
In canvas view 1 (down arrow):
- Select the down arrow icon
- Select click actions on the right hand menu
- From the Type dropdown select Canvas
- From the Canvas dropdown select This Canvas
- From the Canvas View dropdown select View 2
- Then select the Plus sign next to Add Action
- From the Type drop down select Show Canvas
- From the Canvas drop down select the Canvas titled Answer 1
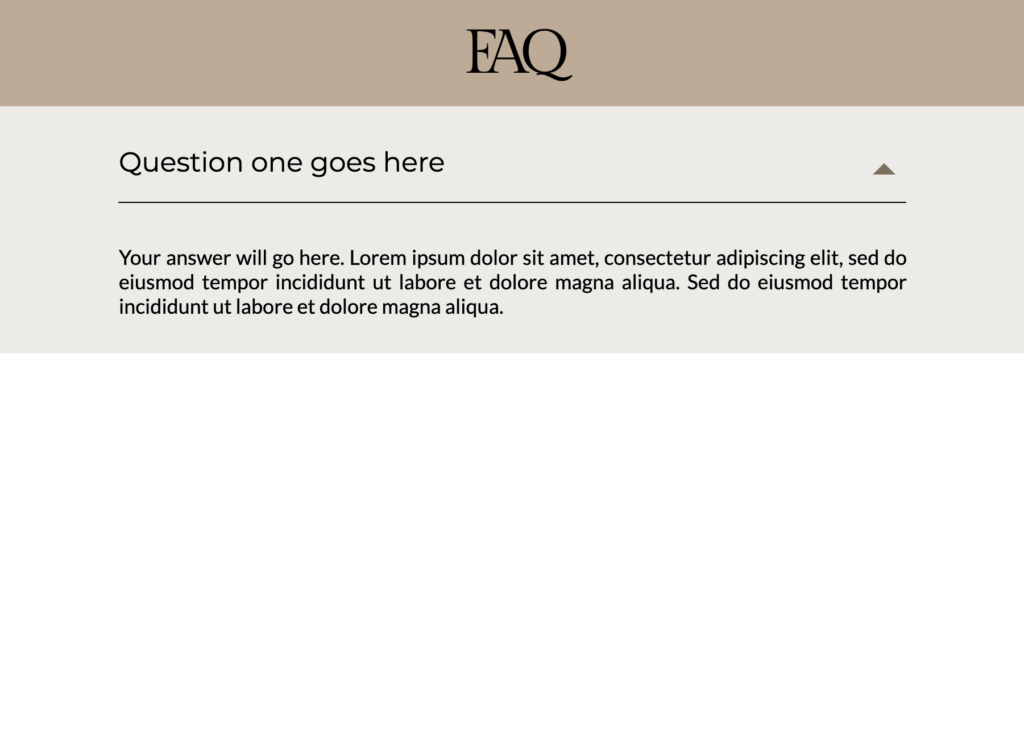
What exactly does this do? Selecting Canvas View 2 from the Type drop down makes it so that when someone clicks the down arrow the canvas view switches to View 2. In View 2 the arrow is pointing upwards. And when we added the action to show the Answer 1 Canvas, this triggers the answer to appear below the question.
In canvas view 2 (up arrow):
- Select the Up Arrow icon
- Select click actions on the right hand menu
- From the Type dropdown select Canvas
- From the Canvas dropdown select This Canvas
- From the Canvas View dropdown select View 1
- Then select the Plus sign next to Add Action
- From the Type drop down select Hide Canvas
- From the Canvas drop down select the Canvas titled Answer 1
This is similar to the actions we added to the down arrow. Here we are changing the arrow back to the down arrow and hiding the Answer Canvas. Basically taking it back to how it looked before you opened the answer!
Adding functionality to the Answer canvas
- Select the Answer 1 Canvas
- Select Canvas on the right hand side
- Toggle on Hidden to Start (be sure it’s turned on for both mobile and desktop)
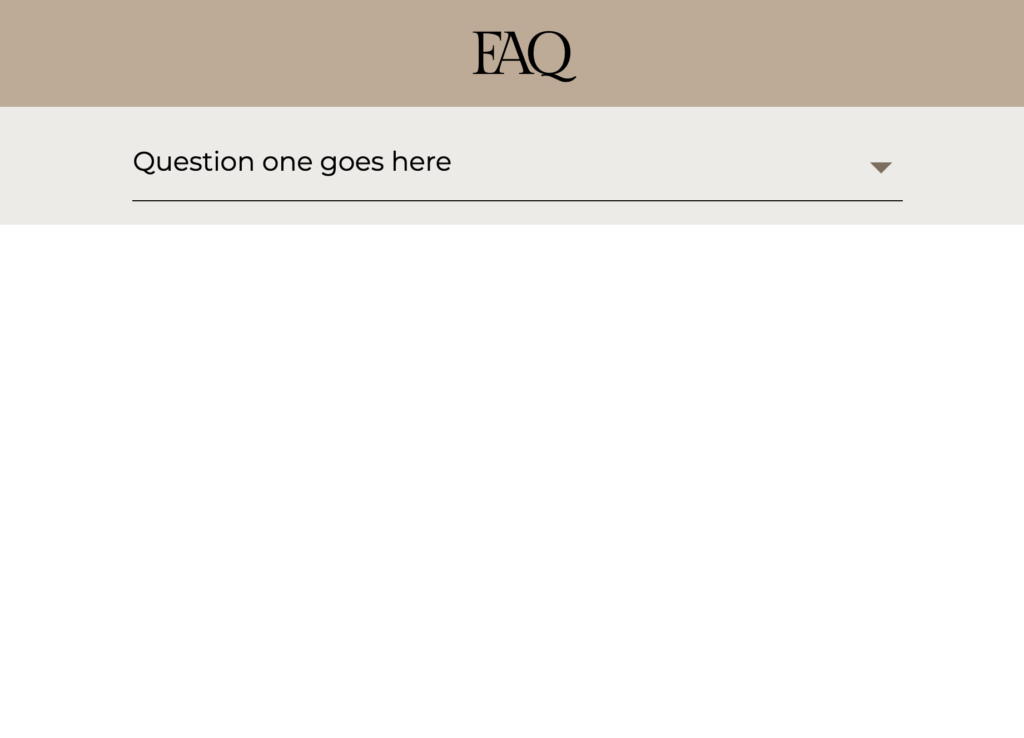
Tada! That’s how you can create functioning Question and Answer Canvases with an accordion effect on Showit!
Adding the rest of your questions and answers
We have added the design and the functionality to both the Question and Answer canvases. Now all you have to do is duplicate them and slightly modify! Let’s do one together!
Duplicating Canvases
- Select the three dots on the Question 1 Canvas
- Select Duplicate
- Drag this duplicated Canvas below the Answer 1 Canvas (to keep them all in order)
- Change the name of the Canvas to Question 2
- Do the same thing to duplicate Answer 2. Drag it below Question 2 and change the title of the Canvas to Answer 2
Modifying functionality on both Canvases to show Answer 2
Start by swapping out the copy for Question and Answer 2 then let’s update some settings! A lot of it will stay the same but we just want to make sure the arrows for Question 2 are showing the right answer!
- Select the canvas Question 2
- Select the Down Arrow icon in View 1
- Leave everything the same in Click Actions except change the Canvas from Answer 1 to Answer 2 in the Canvas drop down
- Select the Up Arrow icon in View 2
- Leave everything the same in Click Actions except change the Canvas from Answer 1 to Answer 2 in the Canvas drop down
And from there you would just repeat as needed for each Question and Answer!
You’ll also love…
Website Content You Need (Easy To Follow Guide)
Everything you need to know about Showit websites for business
