


Okay so you had a website designed on Showit for your business but you don’t really understand how it works…
This could be applicable to you whether you had a Designer build your Showit website for you OR you purchased a Showit template but now don’t really know how to update it.
There are so many different aspects you may need to learn to maintain your website but one of the most important ones is understanding the difference between a Page Canvas and a Site Canvas on Showit.
I promise it’s not as complicated as it seems when you get to understand the difference!
So let’s get into it…

Your entire website is built up of different canvases on pages
The “pages” of your website represent just that, all of the different pages you have created.
So like your:
-
Home page
-
About page
-
Services page
-
Contact page
-
etc.
And each of these pages are made up of multiple sections called “canvases”.
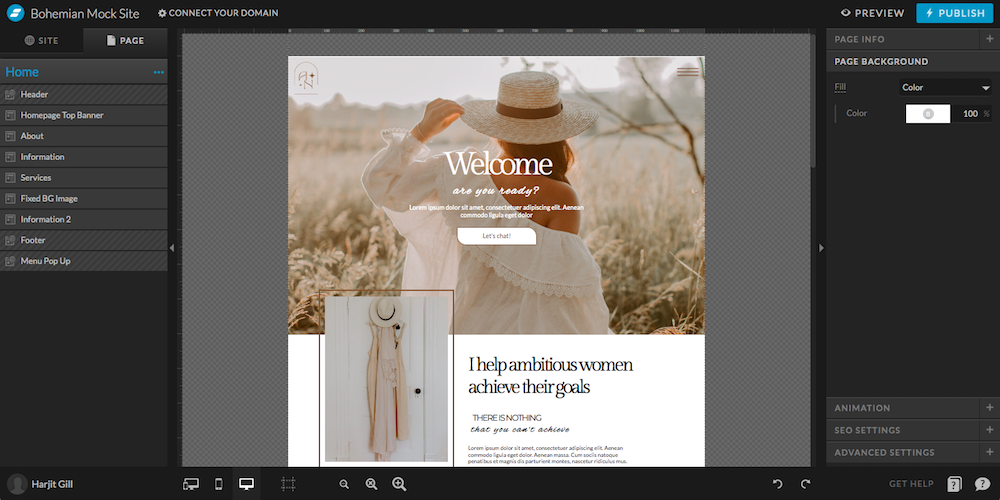
The screenshot of the Showit Editor above shows the different canvases on the Home page listed on the left hand side.
The order of how the canvases show up on the page is determined by the order they are listed in.
You can move the canvases above or below others by dragging and dropping in the list to move them around on that particular page.
You can also rename each canvas to stay organized. This is super important especially as you are building a website.
Also, if you want to use a specific canvas on another page of your website (we get into this more, don’t worry!), it’s important to easily be able to find what you are looking for.

You know you need a website for your business but you have no idea where to start?
Don’t worry, I got you!
Sign up to download your FREE Website Content Roadmap to get started!

One of my favorite parts about Showit is that you can actually duplicate canvases and use them throughout your website.
You can keep them exactly the same or modify them. Either way, you are saving yourself a lot of time by reusing canvases on the same website.
This is really important because not only does it make the site building process faster it also helps create a beautiful website.
You don’t want every single canvas on your site to look super different from one another. You want your site to look cohesive and reusing canvases really helps keep your site looking well put together.
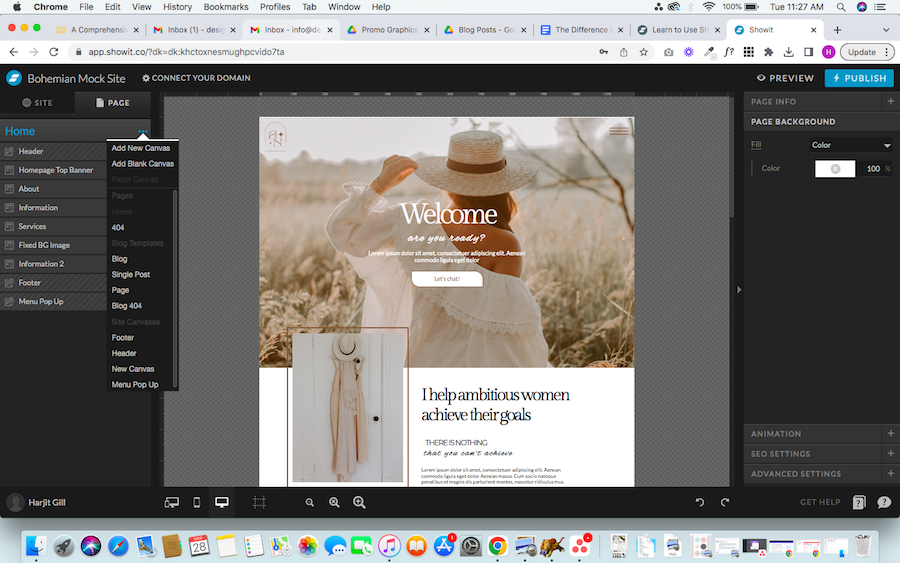
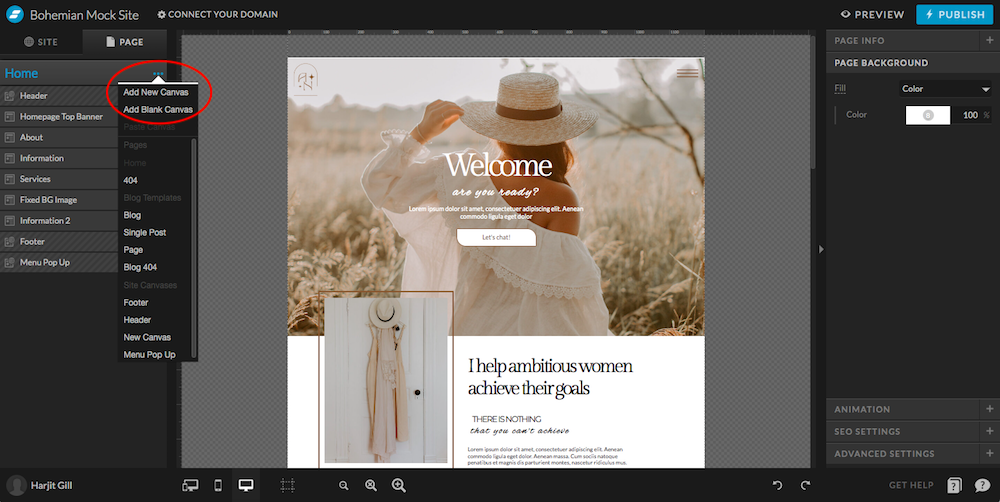
When you are on the page you want to add a canvas to, just click on the three dots next to the page title and a drop down will show.
From there you can select add new canvas or add blank canvas (see the image above).
When you select add blank canvas you will get a completely blank canvas that you can design from scratch.
If you select add new canvas you will have the option to select from canvases that already exist on other pages of your website. (see image below).
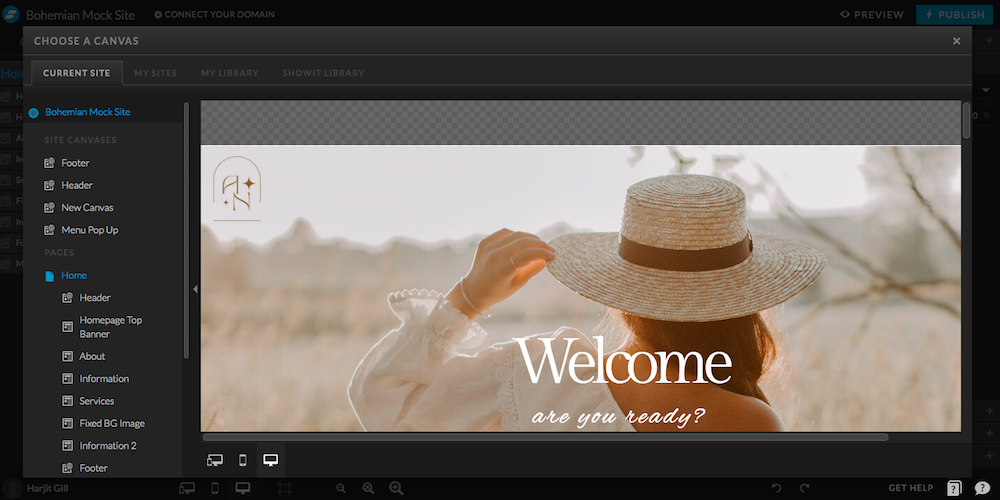
In this image you can see the “site canvases” listed at the top of the list on the left hand side and the “page canvases” listed under the page selected, in this case it’s the Home page.
You can select either of these to add to your page.
So even though you are able to add both site canvases and page canvases to different pages throughout your website, there is a difference of course.
Showit Page Canvas
With page canvases you can edit them on each page independently.
So for example, if you build out a Home page with different page canvases and then you choose to add a page canvas you created on your homepage on your services page – you would head over to your services page and select add a new canvas and select the canvas you want to add.
When you edit that page canvas on your services page now, it will not affect that same page canvas on the home page.
They can both look completely different from each other if you want them to.
Showit Site Canvas
With a site canvas you would add them to different pages exactly how you added the page canvas.
The difference now is that site canvases are all connected.
So if you create your site canvas on your home page but then add it to your services page, if you edit it on either it will apply the same changes to both, they will always look the exact same!
Here are some examples of when you would choose to use a site canvas or a page canvas
Showit Site Canvas Examples:
-
Header
-
Footer
-
Testimonials
-
Forms
The header and footer are two of the main examples because every site has both. And you want them to look the same on every single page. For this reason you want to make sure that after you build your Header or Footer as a page canvas you convert it to a site canvas.
Basically any canvas that you want to look the exact same on multiple different pages should be converted to a site canvas.
Story time:
I have built testimonials on page canvases and then decided I want the same page canvas on another page and made the mistake of not converting it to a site canvas.
And then when I went to edit one on a specific page I would have to then go to the other page and manually edit the same thing. Converting them to site canvases will save you a lot of time so that you aren’t making the same edits multiple different times.
PRO TIP:
You need to convert to a site canvas before you add it to another page! If you convert it afterwards it will not affect the canvas on another page – only the one you’re currently converting will become a site canvas. The same canvas on another page will remain the same page canvas.
Showit Page Canvas Examples:
Basically every single other section on your website that you don’t want to look the same on every single page.
Like your:
-
Top banners canvas
-
Introductions canvas
-
Information canvas
-
etc.
The image below shows you how to add a new canvas to a page
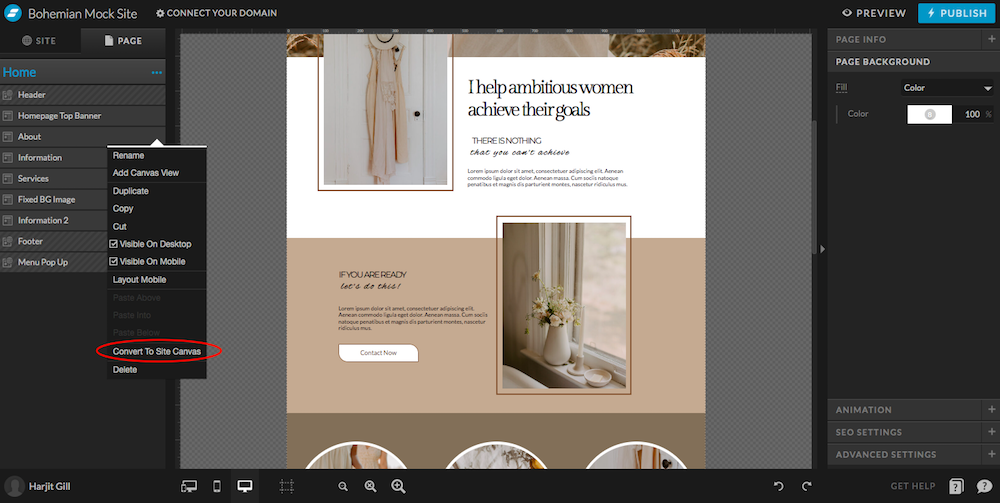
The image below shows you how to convert a page canvas to a site canvas

5 Signs It’s Time To Hire A Showit Website Designer
Why You Need A Website For Your Business
