


If you have already decided to make the move and just want to get right to it. You can keep on scrollin’ down to “Switching from Squarespace to Showit”
The difference between Squarespace and Showit
User friendly
You may be on the fence trying to decide if you should be switching from Squarespace to Showit. If that’s you, then here are some reasons why I made the move and why I decided to make my client websites on Showit vs. Squarespace.
If you want to DIY your website, both Showit and Squarespace have free templates available that you can customize. This is a great option if you are just starting out in your business and you have more time availability vs money to spend.
These DIY websites will be useful for your first year or two in business but after that as your biz grows you want your website to represent that. That’s the time to either invest in a designer for a custom website OR purchase a template and customize it. The difference between free templates and templates to purchase is pretty obvious. The free ones are a lot more basic and generic and the ones built by designers for purchase are designer quality. Or you might be in a place at this time where you want a full custom website.
Both Showit and Squarespace will be the same to manage on your own. I don’t find one is harder than the other when it comes to maintenance if you don’t want to continuously invest in a designer to maintain your site and choose to do that yourself.
Customer service
Both platforms have incredible customer service support. You can either email them or use their chat box and they can pop into your website and help you troubleshoot. This is super helpful with any tech issues you may encounter.
Interface and design capabilities
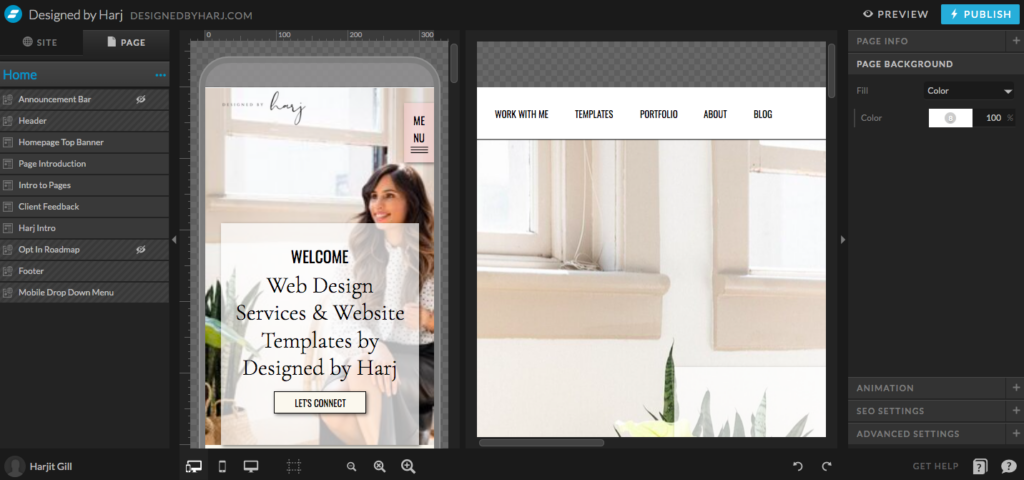
Sorry but not sorry, Showit kicks it out of the park in this category. Showit is a true drag and drop platform. If you have ever used Adobe then it may look familiar to you. Showit was originally designed for photographers so they could create unique and creative design layouts.
Every little pixel on your website is going to be designed uniquely for your website. You can place anything anywhere! You can also create really intricate functionalities. For example, a sliding section on your website that scrolls through different information. Create a folder design where your visitor clicks on different tabs for different info. The design capabilities are honestly endless. Showit is a creative’s dream come true!
I know Squarespace has updated to their fluid engine. This is designed to make it a “drag and drop” platform but if you’ve used it, it’s pretty clunky. You are still very limited as to where elements are placed etc.
Because Showit does have the ability to create unique design and functionalities within the platform you really don’t need to use code. On Squarespace you don’t need to use code either. But if you want a unique design then you definitely need to add some code in there. So if you’re a designer who doesn’t code that can be frustrating and if you’re a client trying to update a Squarespace site that has code, you really want to make sure you don’t break anything when updating.
Integrations
One thing that Squarespace is great for is that it really is an all in one platform. You can do everything on it from blogging, e-commerce to scheduling.
Whereas Showit does not natively have those capabilities. However, I don’t find this to be an issue because there are platforms that Showit integrates with for each of these functionalities.
For blogging, Showit integrates with WordPress. I know, this might sound intimidating but it’s really not super complicated and once it’s set up you don’t need to think about it again.
The reason I love using WordPress for blogging is because it’s a super powerful SEO tool. WordPress connects with Yoast which is a WordPress Plugin that helps you optimize each post before you publish them. It will show you exactly where you need to make changes and if your post is Search Engine Optimized.
For e-commerce on Showit you can integrate with Shopify or Thrivecart. I’m sure there are more but these are common ones.
For scheduling, you can still use Squarespace Acuity Scheduler if you love it. Or you can use any other scheduling platform and embed on to Showit or link out to it.
The thing to remember is, yes Squarespace has these built into its platform but that doesn’t mean these things are free once you are signed up with Squarespace. You will pay additional fees for a lot of these add-ons (e-comm, acuity, etc.)
So it doesn’t end up being a huge difference that you have to pay additional to other platforms for similar capabilities and then connect them to Showit.
Switching from Squarespace to Showit
I have not met a single person who has switched from Squarespace to Showit and been upset about it! Just sayin’
Moving your website design layout over from Squarespace to Showit
Ok, so there’s no magic button or code that will literally transfer over your design from Squarespace to Showit. You will have to manually redesign your website. But this can be a really great time to how to use Showit and get comfortable with the platform.
Showit provides a free 14 day trial and you can use this time to play with the platform and get used to it. You can pull up your website on an ipad or in another tab to look back and forth. And just recreate it!
Warning: you may start to redesign when you start designing on Showit because it’s just that fun to design on Showit!
I would recommend designing everything and then connecting the buttons and links very last. Just incase you change the name of any canvas (section) or page on your website, you don’t want any broken links.
If you have no idea how to even design on Showit. Showit offers really easy to follow guides where you can learn how to actually use the platform!

Pricing – First you want to determine which Showit account you will be signing up for
If you have an existing blog that you want to migrate over, Showit has made it as easy as possible to do this. The Showit team migrates your blog for you! In order for them to do this you are required to sign up for the “Showit & advanced blog option”.
If you move forward with having Showit migrate the blogs for you, be sure to pop in and double check what they look like on your live blog. You want to make sure all images, opt-in forms, etc. are displayed correctly.
If you do not have too many blogs you can choose to move the blogs over yourself and just sign up for the “Showit & Basic Starter Blog” option to save some money there. Or if you do not have a blog yet but want to start one then you will also go with this plan.
If you do not/will not have a blog then you don’t have to worry about any of that and just go ahead with the “Showit” plan.
And of course, you can always upgrade/downgrade your plan if needed.
Bonus: GET ONE MONTH FREE ON SHOWIT
Use code: dbhclient
Here’s some more useful info on Showit pricing
Connect your domain
Connecting your domain has never been easier!! Seriously, you can now update your DNS records with a click of a button! I cannot tell you how much anxiety this has saved me..
Showit walks you through exactly how to connect your domain depending on whether you have a blog, are migrating your blog or don’t have one at all.
Just follow these links to access the Showit domain connection guides:
- How to connect your domain if you do not have a blog
- How to connect your domain if you are starting a new blog
- How to connect your domain if you are migrating your blog
It can take up to 48 hours for these changes to propagate across the worldwide web. Usually, it doesn’t take that long and can happen in a matter of minutes to hours but that’s not a guarantee.
Last step is to secure your website with an SSL certificate. Once you have connected your domain, reach out to the Showit team through the chat button on the bottom right of your design app. Select “Messages” then “Send a message” and select “I need help launching my site”.
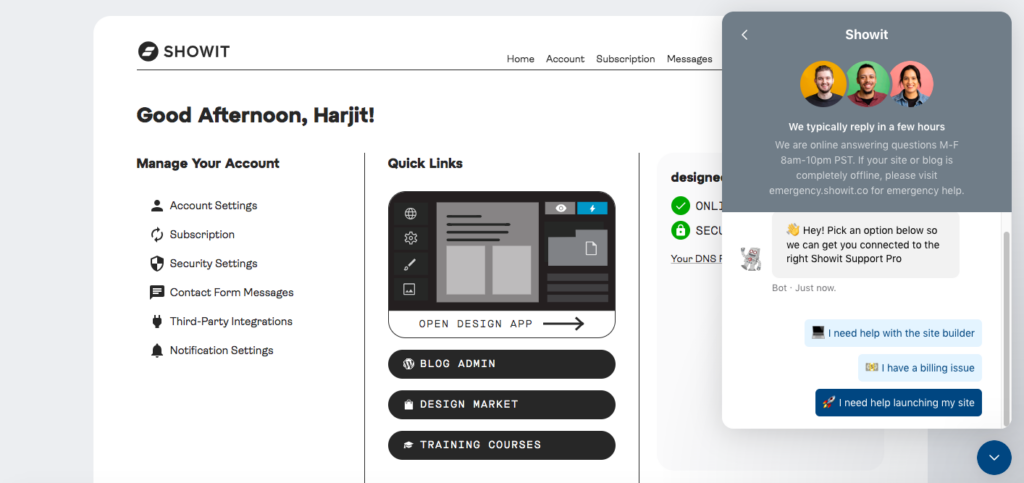
In the message write “I have updated my DNS records with my domain registrar, can you please apply the SSL certificate for me”. And the Showit team will secure your website. You don’t have to wait the 48 hours to send this message; you can send it right after updating your DNS records. If it’s not ready for them they will let you know!
Publish Your Site!
Once these steps are all complete, the team will let you know the SSL certificate has been applied. Your site is ready to launch!! Just hit that Publish button on the top right hand side of your design app.
And just remember, if you make any updates to your site/add a new blog post, always hit publish to make those changes live.
