


Today I am going to show you step by step how to add and edit buttons on Squarespace
You want your website to be unique to your brand and to do this every element needs to be aligned with your vision for your business
When creating a brand you choose your color scheme, you have a logo, you choose fonts, all of these things keep consistency throughout your brand (brands are so much more than just these elements but that’s a topic for another day).
But even more than that you want to think about all of the shapes and how they are presented on your website as well.
Shapes of the blocks you are using, shapes of the images and the content within these images. And also – the shapes of your buttons on Squarespace! Your buttons really can add to your brand aesthetic in such a unique way!
And the great thing is that within Squarespace you have the opportunity to switch up your buttons throughout your website if you choose to. I wouldn’t do any more than two different button shapes though as this can become slightly distracting! You want to keep your designs clean and consistent!

Today I am going to show you exactly how to add and edit buttons on Squarespace 7.1
Buckle up and let’s get editing!!

First things first…
We want to set your button designs before we start adding them to your website.
The best thing to do is start by setting all of your design settings first – fonts, colors, buttons etc. so when you start your website build you know exactly what everything is going to look like!
To start editing your buttons on Squarespace go to your Site Styles Page by following these instructions:
-
Log into the back end of your website
-
Select Design on the left hand side
-
Select Site Styles
-
And then Select Buttons on the right hand side
This is where you will create your button styles that will be used throughout your website!
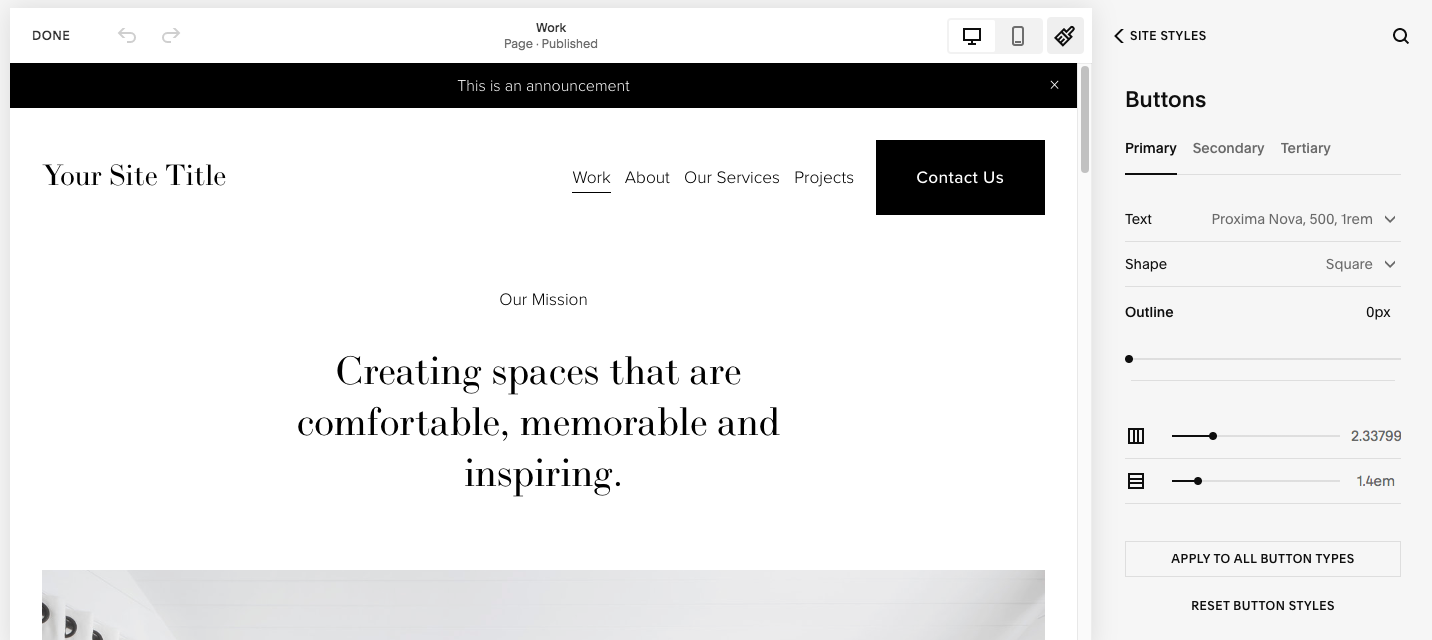
referencing the image above…
There are three tabs right up top with the headings “Primary, Secondary and Tertiary” Depending on which one you want to edit – that’s the one you will select. You have the opportunity to set different styles for each of these buttons if you choose to!
The very first drop down menu is to select your text
I would keep my text pretty consistent throughout the website so it doesn’t look like there’s too much going on.
A good practice is to set one button with the Headings text you have previously set for your fonts and then one button with your Paragraph text. Two fonts are best practice! A third font can be sprinkled throughout the website but not used super consistently!
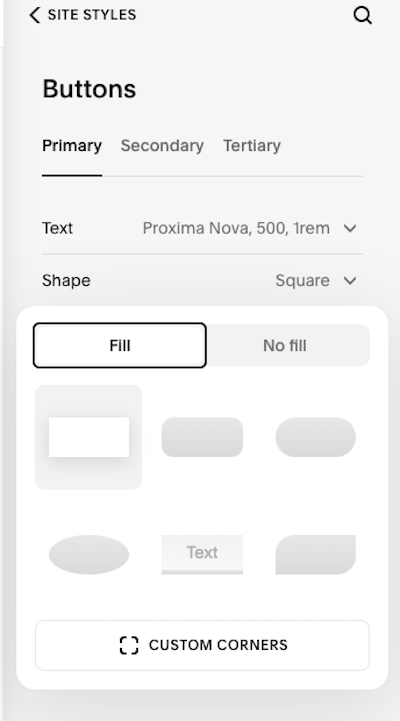
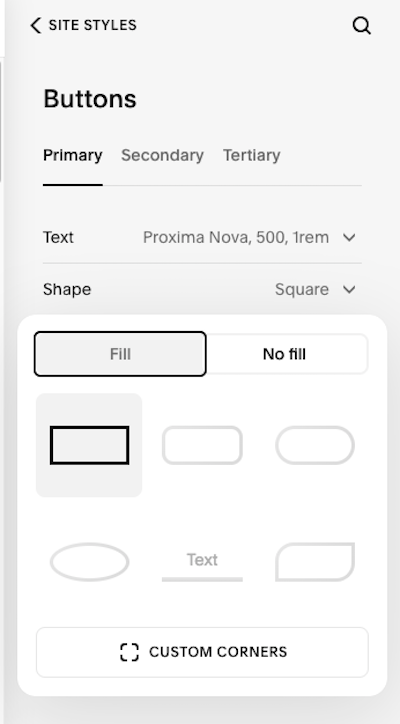
Right below that you can choose which Shape you would like for your button
And you can go even further by selecting whether the button will be filled or just outlined by either selecting “fill or no fill”.
You can also choose to customize the rounded corners to your own preference.
Next up is the Outline
This is to change how thick or thin the outline of your button is.
You will really see the difference here when you are working with a no fill button.
And below that you have two editing options for the padding around the button
The little square with the vertical lines will add/remove padding on the sides of the button (adjusting the width)
The little square with the horizontal lines will add/remove padding above and below the button (basically adjusting the height of the button)
And from there you have the options to apply to all button types or reset your settings
You can go through each button type (primary, secondary and tertiary) to select individual settings.

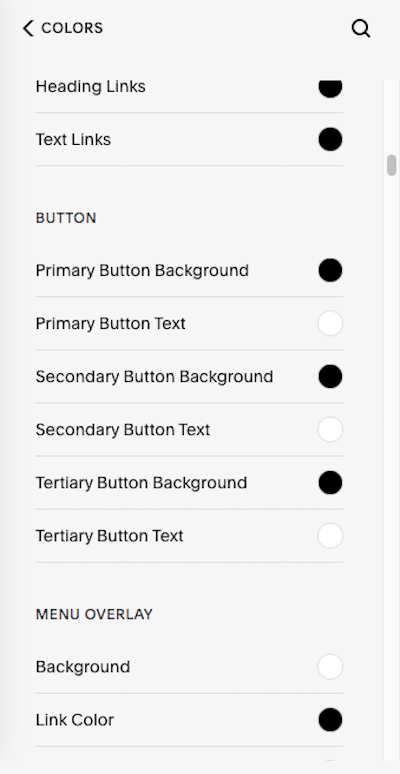
And if you want to change the colors of your buttons you would do this in your Colors setting within Site Styles
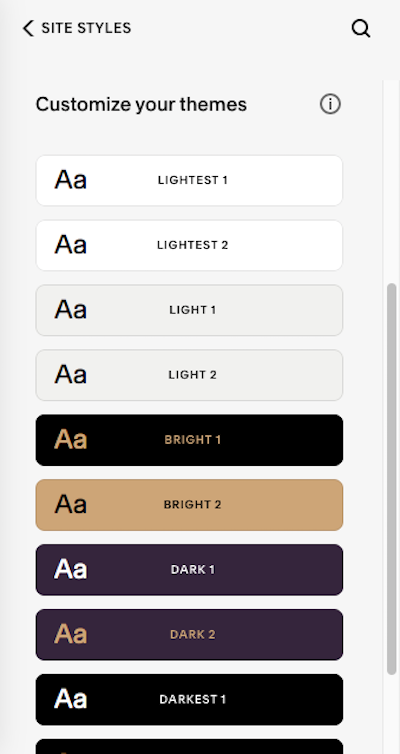
You have quite a few color themes to work with here. I honestly usually only use 3-4 different settings throughout a website to keep it looking very clean and aesthetic. But this is totally up to you and it really depends on the website!
When you choose a template from squarespace it will come with the colors pre selected for you. Or you can change your color settings to your brand colors!
For the purpose of this blog and sticking to the theme of buttons – I will show you how to edit the color theme for your button!
Select the color theme you want to work within under Customize your themes and scroll down to the Button section to edit your colors
As you can see you are able to change the color for each button type here. So when you add a button you can select which button setting you want and the colors will apply automatically! (I’ll be showing you how to edit your button block on your website page next).

Okay, now to add those buttons to your website!
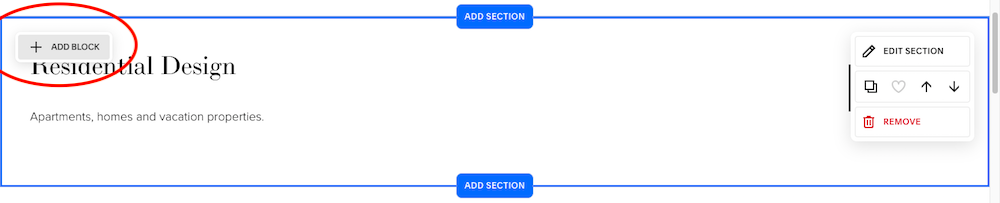
Log into the back end of your Squarespace website and click “Edit” on the page you want to work on
Go to the section where you want to add the button and select “+ Add Block”
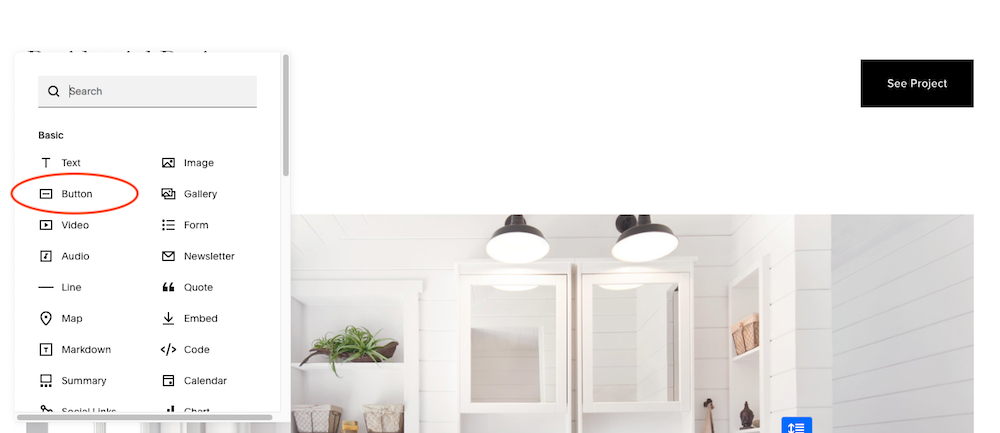
Select “button”
You will see the button block pop up on the left hand side. You can click and drag this to where you would like to place it.
When you start to click and drag a grid will pop up in the background as you can see in the image below.

From here you can see the editing options that are right above the button block (see the image below)
The Pencil icon will take you to more editing options.
If you select the arrow next to primary you can select between the three different button styles you have previously set in your button settings.
The two icons of layered squares next to this are to either bring the button to the back or the front when layering blocks.
The two squares with solid lines are to duplicate and next to that is the trash can to remove the block.

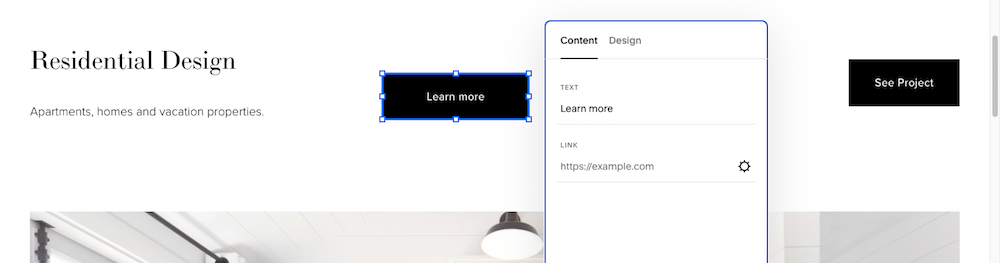
When you click the pencil icon you can edit the text on the button under the “content” tab. And you can also select where this button is going to take the visitor by selecting the gear icon
When you select the design tab you can change which style setting you want for the button – primary, secondary or tertiary.
You can also select edit button styles here when you select the drop down arrow next to the button selection. This is a shortcut to edit your button settings.
You can also select fit or fill. This is going to either fit the button within the block or stretch the button to fill the block.
You can play around with this setting to see what you like better visually on your website!


