


Adding your font style and colors to your Showit website is so easy!
This should be the very first thing you do because it will make the rest of your design process so much easier!

Prefer to watch?
Here’s the video!
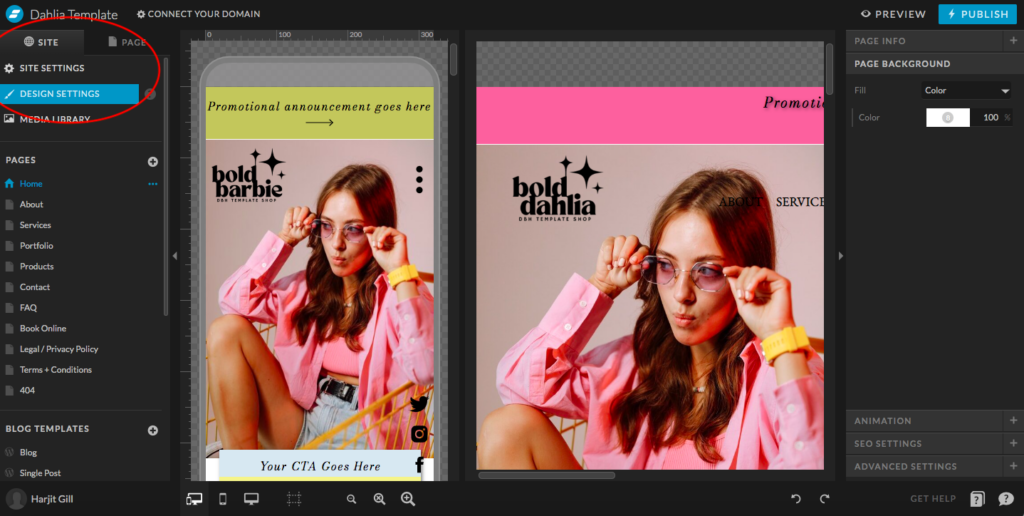
First things first, log into the Showit design app (be sure to use a Chrome browser). On the left hand side you will see two tabs: Site and Page. Select the Site tab and then select Design Settings as you can see in the image below.
Here you can see all of font style and colors that are currently set for your website.
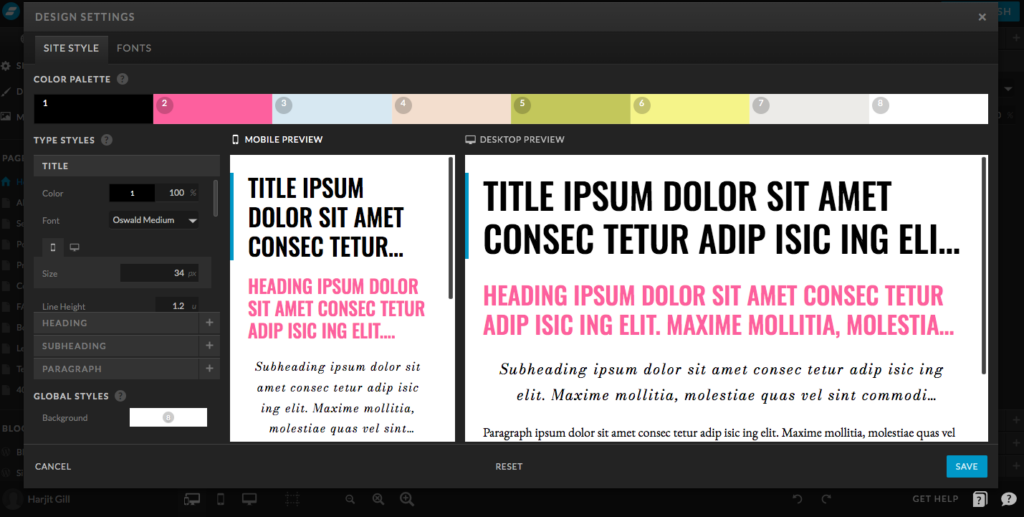
There are two tabs here as well: Site Style and Fonts.
Within the Site Styles tab you are going to apply all of your settings. The Fonts tab is to select your fonts which you will then assign through the Site Styles tab. So let’s take a look!
Add your brand colors
Simply click on any of the colors in the row and paste in your hex code. Do this for all of your brand colors to have easy access to update colors on your website! I would recommend keeping the black and white color options as these are commonly used even if they aren’t technically in your brand colors.
Select OK and be sure to Save!
If you are using a template, any color on the website that is using a specific color will automatically change to the color you have just added. You can see that each color is numbered. That’s because when you change your colors on your website you will be able to select from these numbers. If you are building your website from scratch it doesn’t matter too much. But if it is a template that you are customizing then be sure to double check the colors look good the way they are added automatically. Or you might want to play around with color placement and swap them out as needed.

How to add your fonts
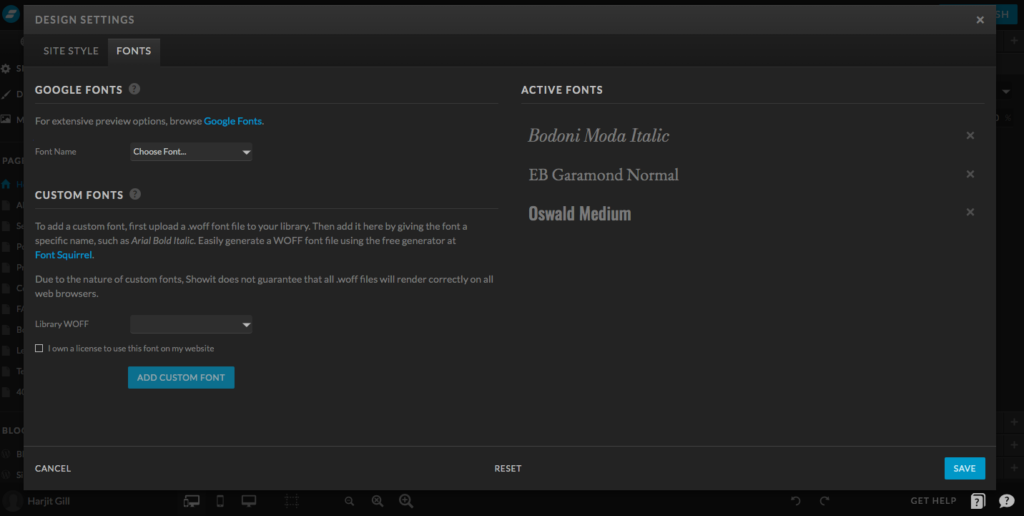
Let’s move over to the second tab to start. Go ahead and select the Fonts tab. On the left hand side is where you will select your fonts and on the right hand side it shows what fonts are existing on your website.
Add free Google fonts
To add a free Google font you will select the Font Name drop down right under Google Fonts. If you have custom fonts within your brand we can upload them to your website here. Be sure to have a WOFF file type for your custom fonts as this is the one that Showit supports.
Add custom fonts
Before we can select your custom font here you need to upload your font file to your media library. You will be able to access the media library the same way you accessed your Design Settings. Make sure you save any changes you have made to your design settings and close that tab. You will see the Media Library right under the Design Settings on the left hand side (reference first image). When you select Media Library you will be able to either upload or just drag and drop your font file into your media library. You will see it’s added to your files next to any images you have uploaded here.
Now that your custom fonts are uploaded to your Showit website we will add them to your design settings by heading back to that Fonts tab. You will see there’s a drop down next to Library WOFF under Custom Fonts. Your font will show up here after it’s been uploaded to your Media Library.
Font licensing
Be very careful with custom fonts, make sure you have purchased your own font file and have a license to use it. If you are unsure about how a font can be used you can always reach out to the font designer through Creative Market and ask any questions you may have.
When I upload custom fonts for clients I always get them to purchase the font license themselves so there is never any issue with licensing in the future.
Once you have selected your custom font you will see it pop up on the left hand side.
Whether you have added a free Google font or a custom font, make sure you hit Save before going back into the Site Styles tab. Otherwise the fonts you just added won’t actually save and show up on Site Styles.
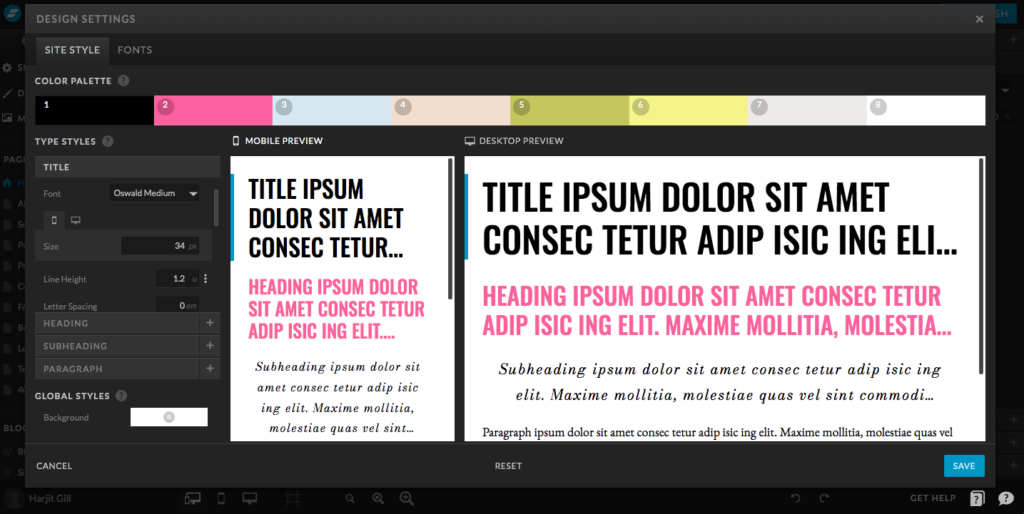
On the left hand side you will see Type Styles. This is where you apply all of your settings for your fonts. You can get super detailed with your font settings here. Go through each of the following and add your brand fonts appropriately:
- Title
- Heading
- Subheading
- Paragraph
Once you have added your fonts to each of these options, you will be able to customize even further when you select each one.
Font styles on mobile vs desktop
The best part about Showit is that you can have separate settings for Mobile vs. Desktop. Take a look at the image above and you will see that right next to the Line Height there are three little dots. This is how you will either separate or merge your mobile and desktop settings together. You can see in the image below when you select the three dots it gives you the option to “split mobile and desktop”. If the two were already split then you would have the option to “merge using mobile/desktop” when you select the three dots.

You can also see the little mobile and desktop icons when the settings are split. You can select each one to edit them separately. If you want the settngs to be the same, for example you edit mobile and want to have the same settings applied to desktop. You would just stay within the mobile option, select the three dots and select “merge using mobile”. This will apply the mobile settings to desktop (and vise versa).
You will see that a lot of the different style settings for your fonts have the option to split but some don’t. So just play around with this here and customize to your heart’s desire!
Here’s all of the ways you can customize your fonts for each of these options:
- Color
- Font (this is where you will assign your font)
- Font size
- Line height
- Letter spacing
- Letter case
- Bottom margin
- Align
And then you will see Inline Links. I recommend toggling on that preview button to see what these settings will look like on your live website. These settings are for any “linked” text.
- Color
- Format
- Hover color
- Hover format
All of these settings are available for each font category: Title, Heading, Subheading and Paragraph. Be sure to spend some time here and customize your font how you like it. Once you customize it here you won’t have to think about it again!
How your font style and color settings will be applied to your website.
If you have purchased and uploaded a website template, once you add and save these fonts the changes will automatically be applied to your website. All “heading” text boxes will update to your new “heading” font and so on. If you’re building a website from scratch, any time you add a font box the corresponding font will automatically be added.
If you are using a website template, even if you have updated your fonts here, be sure to always double check the fonts throughout your website. Sometimes certain text boxes will be altered to work with a specific design on a section of your website. So always make sure all of the colors and fonts flow nicely throughout your website.
Last but not least, be mindful of which fonts you are adding to your design settings. You can always add fonts the same way I showed you earlier but not actually “assign” them as Title, Heading, etc. You might want to opt out of assigning a cursive font because this should only be used as an accent font. This is especially important if you have a blog. These font styles will automatically apply to your blog and if you have set cursive font as your Subheading font then it will use it for any H3 tags. Which will not look too great in long sentences!
You will also love…
The Power of an Authentic Website in Attracting Your Ideal Clients
Switching From Squarespace To Showit
