

How to Change Convertkit Success Message Colour

If you have followed me for some time you know I am a huge fan of email marketing!
When I first learned about the Online Business world I remember coaches and business owners talking about email marketing. And I remember thinking to myself, “isn’t email marketing kinda old school?”
I thought it was all my focus needed to be on social media. I didn’t see how email marketing was such a high priority for these people.
But the more I learned about the online business world the more I realized… they were right! Of course they were, they were all making some serious money and running businesses they loved!
So if you have started your email list and are wanting to use your website to help grow it, then you are probably wanting to embed forms from your email provider onto your website.
Today I am going to show you how to use your Convertkit form on your Squarespace website
And I’m going to show you how to change the color of your Convertkit success message from that funky green to your own brand colors!
This was a problem I had when I first embedded a Convertkit form onto my Squarespace website and I couldn’t really figure out how to change that green background. I had looked everywhere on the Convertkit site, through their help forums and everything.
In the end, I emailed Convertkit to see what they recommend and they sent me a CSS code which did the trick!
I want to save you the hassle of sending back and forth emails and just give you the code here and make your life just a little easier!
Embedding the form and changing the background color of your success message is super easy to do and you will be able to connect the form in just minutes!

First things first, you need to create your form on Convertkit! And once you have created your form you can move onto the next steps…
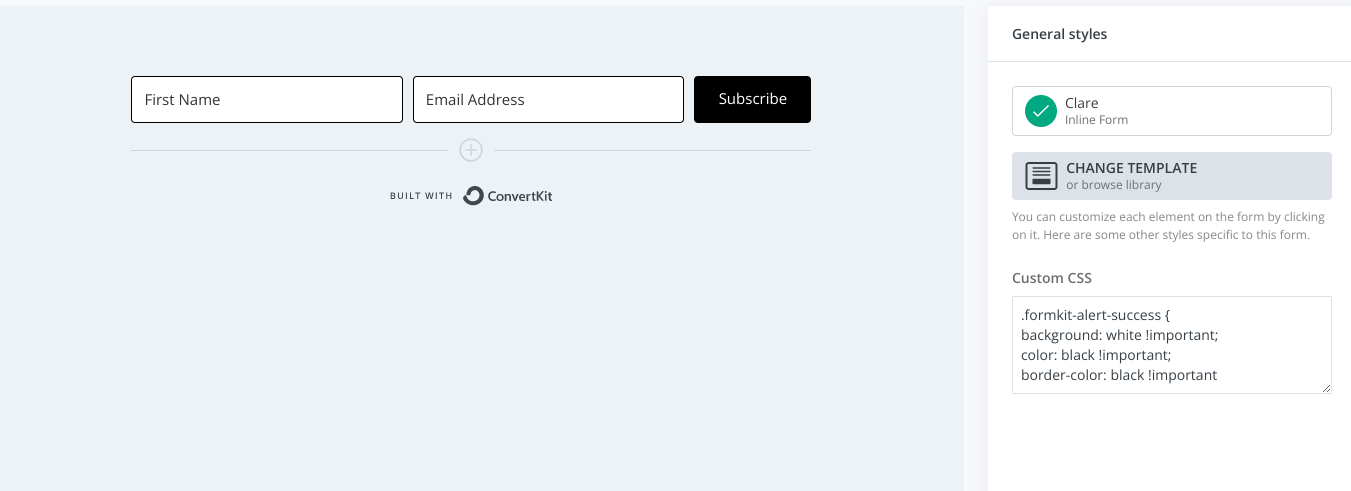
Now let’s change that funny green color of your Convertkit success message on your Squarespace website!
This is easily fixed with some Custom CSS
Simply copy the code I have provided for you below. You can change the colors to match your own brand!
.formkit-alert-success {
background: white !important;
color: black !important;
border-color: black !important
The first row is for the background color. You can place your hex code where it says “white”
The second row is for your text color. You can replace “black” with your text color hex code.
The third row is for the border color and you can do the same here, replace “black” with your brand color hex code.
Then copy the entire Custom CSS Code and paste in the Custom CSS area on your form block. It will be right under the Publish button on your Convertkit Form on the right hand side.
And now to embed your Convertkit Form onto your Squarespace website
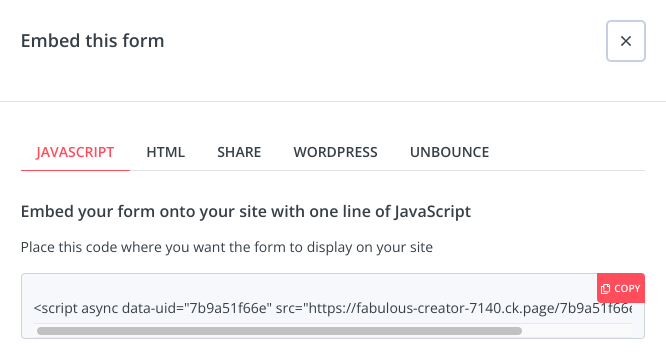
Once you have created your form and all of the information is added (and you have used the code above to change the success message colors), click the publish button on the top right corner.
Once you click publish you will see a pop up appear on your screen. The pop up will provide you with a code to embed your form. You want to have javascript selected and then simply select copy.
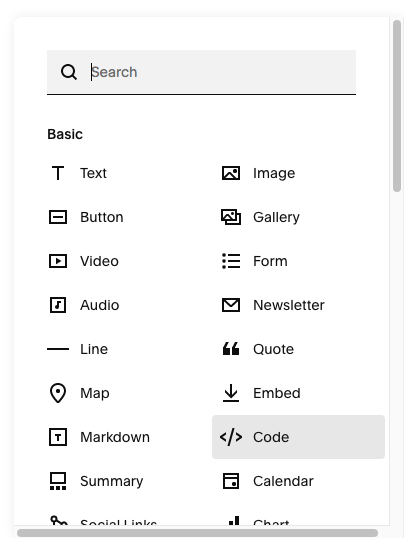
Go to the section on which you want to embed the code and select Add Block
Simply select the code block. Click on the little pencil icon to edit the code block and paste in the code you copied over on Convertkit.
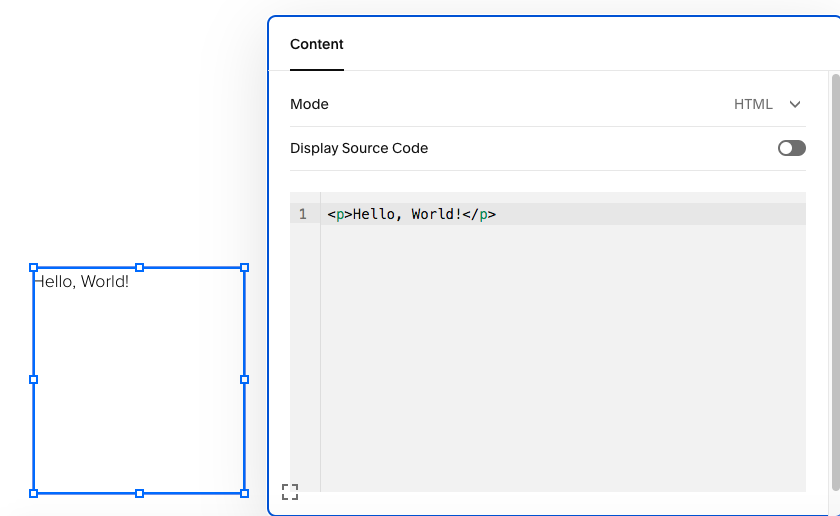
You can drag and drop the code block where you would like it to be on your section.
You can also click on the corners of the block to stretch it and adjust the size.
Make sure you save and click the arrow on the top right corner of your Squarespace site to view what the form looks like on your website.
When you are in editing view you cannot actually see the form so make sure you step out of editing view to see what it looks like!
 Posts you will also love…