


How do you set up a Showit blog?
Showit integrates with WordPress for its blog. I know this sounds intimidating, but you only need to set it up once and never think about it again! In this post I will show build a blog on Showit and how to connect it to WordPress. We will cover one easy design layout. Of course you can get creative with your designs but to keep it as simple as possible we will only review an alternating design layout today.
First things first, let’s clarify what each of these platforms are:
Showit
Showit is a website builder and it’s where your website is hosted. You can design a unique website layout on Showit that represents your brand. It’s my favorite!
WordPress
WordPress is a blogging platform where you can publish blog posts. It’s used by ⅓ of the websites in the world!
Why do I recommend using Showit and WordPress for your website
I am a big believer that your website should truly capture the essence of your business. It is a powerful marketing tool to raise brand awareness and grow your business. As a creative, I love to use Showit for my website and to build client websites. Showit provides 100% design freedom without having to use code! It’s a true drag and drop platform where you can design every little pixel on your website. It’s literal design freedom.
Your business deserves a website that’s unique and speaks directly to your ideal clients. Showit really does deliver that! It integrates with platforms like WordPress (and more) that provide the functionality your website needs.
One of thes reasons I love using WordPress for blogging is because it’s a super powerful SEO tool. WordPress connects with Yoast which is a WordPress Plugin that helps you optimize each post before you publish it.
It’s important to me that you use your website as a marketing tool and not just a pretty place to provide information. It can help you grow your business for years to come. And this is through initially optimizing your website for SEO and then using a blogging strategy. This is the long game my friends. SEO does take time to kick in but when it does it will continue to perform. It’s not like social media where you post and maybe some people see it before it dies within a few minutes.
How a Showit blog works with WordPress
So now you know what each platform does. But how do they work together? You might be thinking, “Will my life be so hard if I have to use two whole different platforms to blog???“
I promise you, it’s not that complicated!
You will design your blog page and blog post layout on Showit and you will write your posts on WordPress. There are some initial integration settings you have to apply in order to pull those WordPress blog posts into Showit. But you only apply these settings once. After that you continue to write your blog posts in WordPress and just hit publish. They will automatically appear on Showit as a new post using your existing design layout! Easy peasy right? Maybe it doesn’t feel like it right now, but it will be!
How to connect WordPress to build your Showit blog
We aren’t going to get too crazy here today. This is going to be a simple overview of how to add a simple blog to your Showit website. You can of course get very creative with your blog posts and your blog page but we will be focusing on simply connecting WordPress to build your Showit blog.
If you prefer to watch and follow along, you can do that here! Jeff from Showit does a great job of showing you exactly how to connect to connect these two platforms to build your blog.
When you are logged into the Showit Design app you will see “Blog Templates” under “Pages on the left hand side.
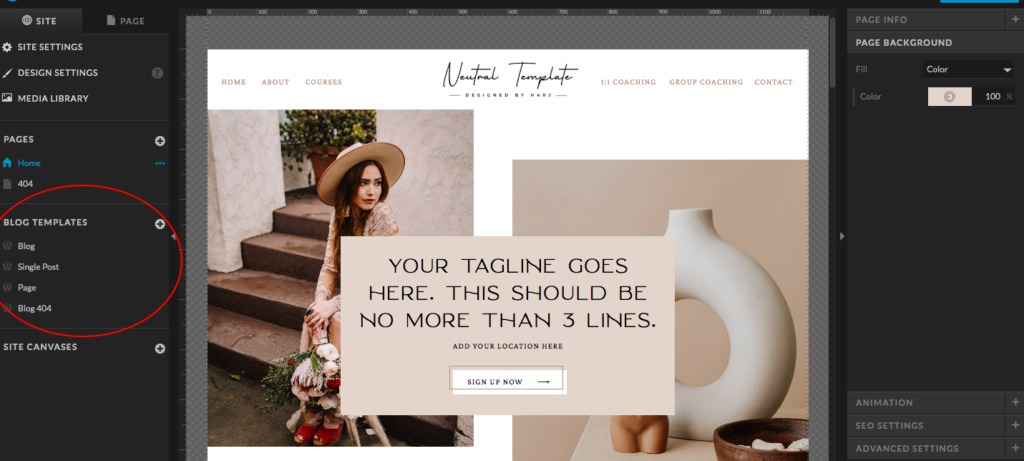
The “Blog” and “Single Post” pages will be used to create a simple blog. The Blog page will be the initial page your viewer will land on when they click the blog link. This is the page that will showcase all of your posts/featured posts etc. The Single Post page will determine what each blog post will look like. You just create this once and it will be used as a template for each and every blog post published on WordPress.
Let’s first set up your main Blog page
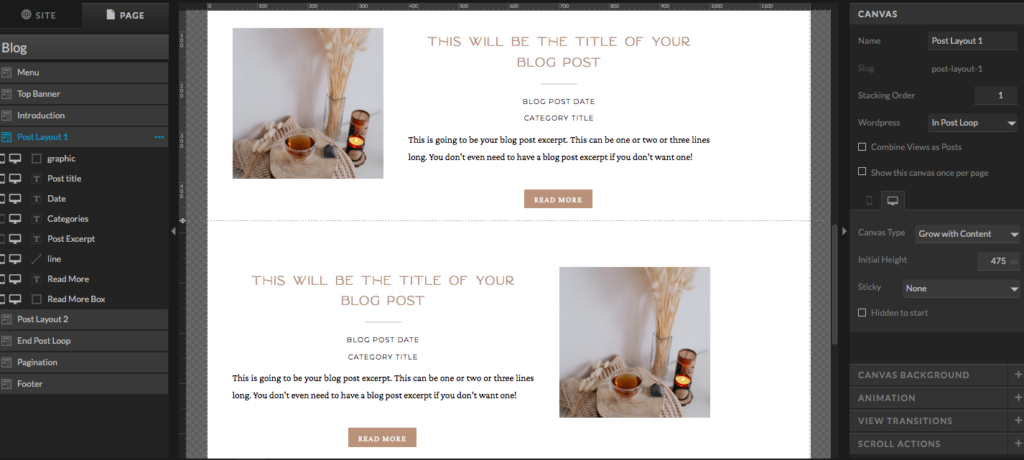
For the purpose of a simple blog page set up we are going to build an alternating design layout today. You can of course have a side by side blog post layout however we will not be covering that in this post. Here’s an image of an alternating Showit blog post layout.
Your Showit blog design layout
As you can see here we only have two blog posts added to the page. This is because this design layout will continuously repeat down the page. You will be able to view a set number of blog posts as your blog grows and then you will have links to view older posts or new posts so your visitor can navigate through your posts!
You might also notice that the images and the copy is the same for both posts. That’s because all of the content on this main blog page is considered placeholder content. Showit really just needs to know what content type needs to be added. For example, an image or a text block. But the actual content it’s going to show on your published blog page is going to be pulled in directly from WordPress. So your each image will be replaced by the “Featured image” set in WordPress. Just as each “Title” will be replaced by the Title added to blog post on WordPress, and so on.
So as you can see, you build your design layout on Showit as you want it to appear on your website. Of course, you will add your header and hero image above your posts. It’s also a good idea to have an introduction section that tells your visitors what type of content they can expect on your blog. However, I’m not going to focus on designing those parts of your blog, as this post is about integrating WordPress with your Showit blog.
So once you have added your image and copy placeholders, it’s time to connect these elements to WordPress. Once these elements are connected they will automatically pull the content you have added to each blog post on WordPress.
Connecting to WordPress
We need to apply settings to each element so that it can pull the content from WordPress.
Connecting your image to WordPress Featured Image
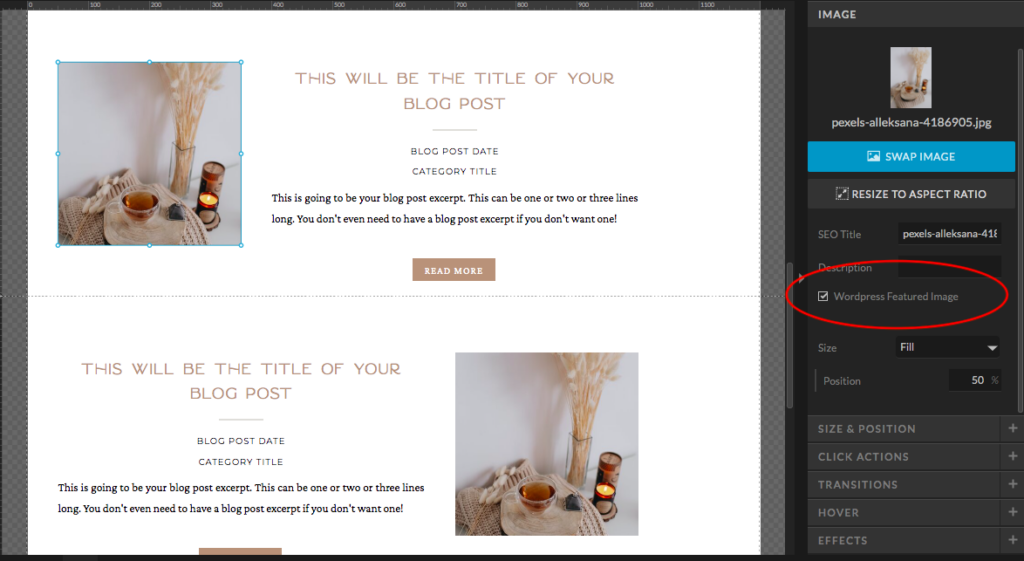
Be sure to select the “WordPress Featured Image” option under your image properties on the right hand side.
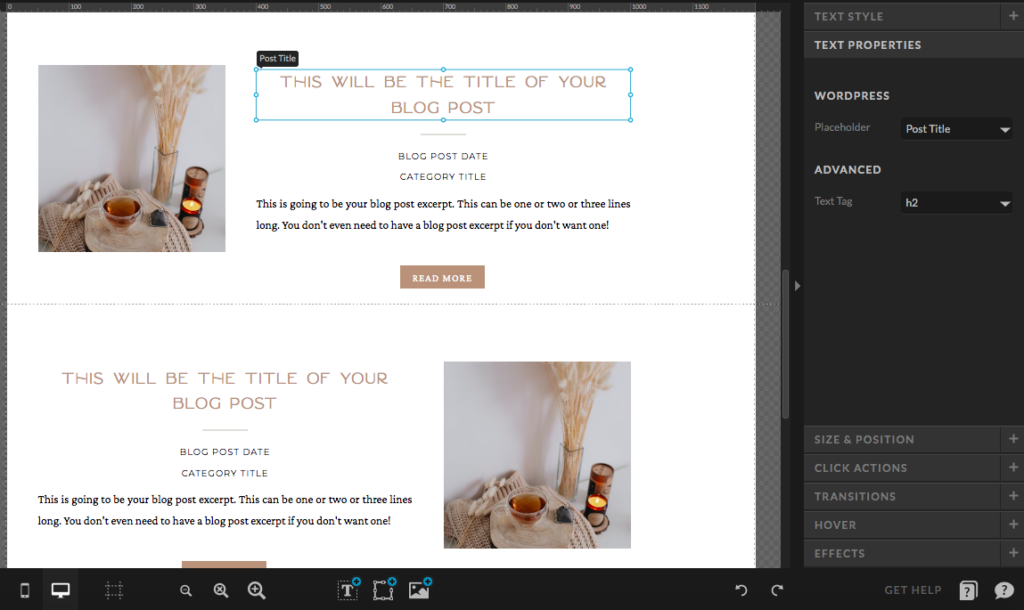
Connecting your text boxes to WordPress
Select the text box you have added for your post title placeholder. Then select “text properties” on the right hand side. The Placeholder drop down will have quite a few options for you to choose from. This is where the magic happens! What you select here will determine what Showit pulls in from WordPress.
For the your blog post title you want to select “Post Title”. Moving forward, any time you click on the title placeholder text box, it will show the little Post Title flag on the corner.
You will do the same thing for your Post Date, Category and Excerpt. You will click on each of the text boxes and select the corresponding drop down from the placeholder options under Text Properties. For your category placeholder be sure to select “Post Category” not “Post Top Category”.
And of course, it’s your decision which of these placeholders you want to add. Maybe you just want the title and featured image with a button to read more. Or maybe you just want the category without the date. Or you want to add Author, which you can absolutely do in the exact same way by selecting “Post Author” from the drop down.
Connecting your button to your post
For your button you want to set a Click Action. You will select the “WordPress Post” for link type under Click Actions.
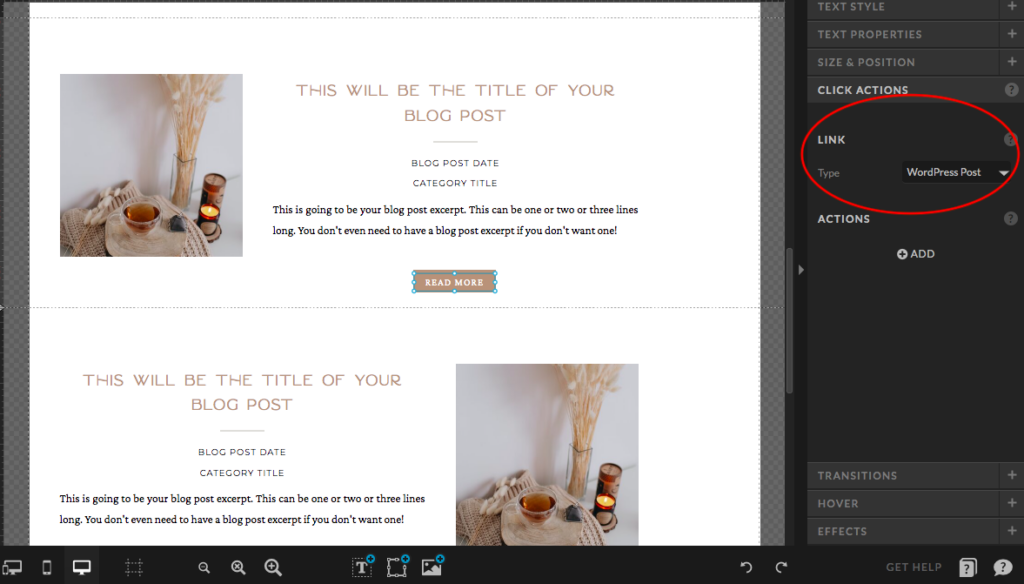
When you go to your published blog page and click on that read more button it will take you to your blog post.
Adding end post loop
We will need to just add a canvas here with settings to tell Showit to reuse the above design layouts on repeat. This canvas does not need a design or anything. You can quite literally make the height 1px so that it’s not visible on your website.
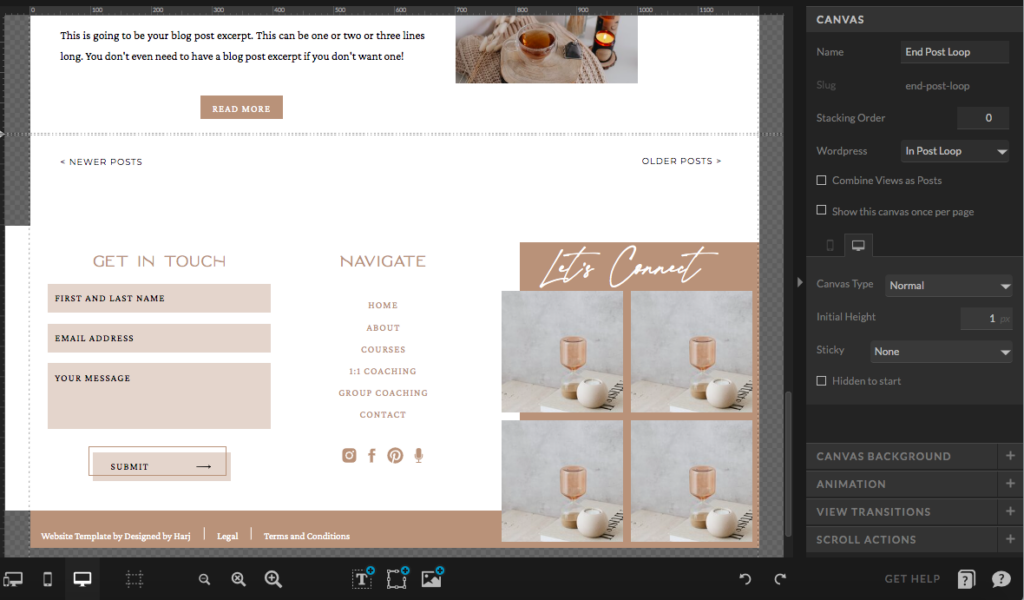
Be sure to add the following these settings to the post Canvas. As this is really the only purpose of it being there! Make sure this canvas is right below the two alternating post canvases. Select “In Post Loop” in the WordPress drop down.
Last thing we need on this page is the Pagination canvas
Pagination is the ability to navigate between different pages on your blog. In this case your reader will be able to view older blogs or newer blogs. Your main blog page will only show a certain number of posts at a time (you can set this in WordPress). And when that number is filled up, as your blog grows, it will show the Pagination options to view older or newer posts.
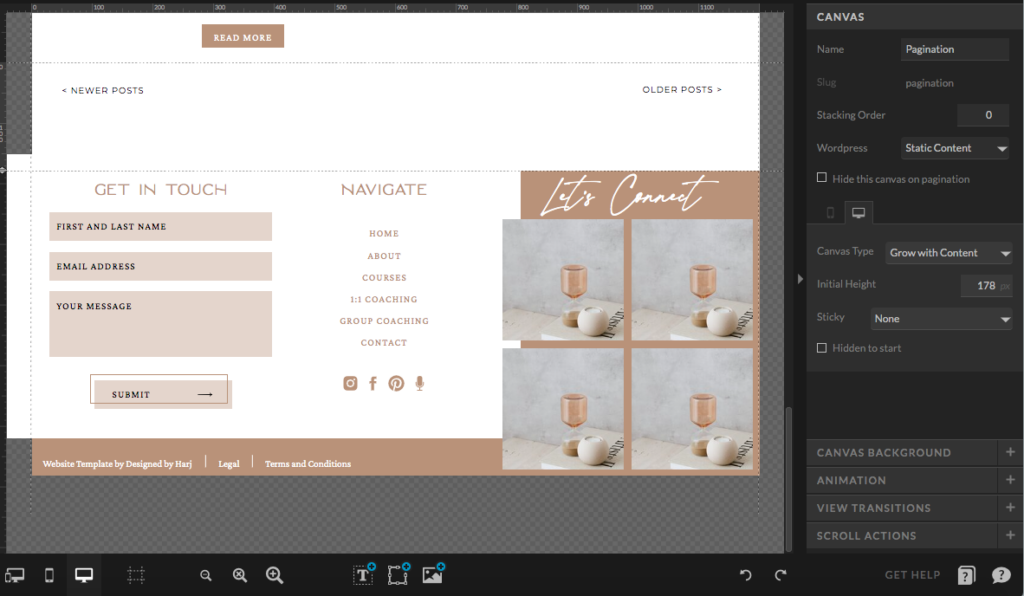
Be sure to select “Static Content” under the WordPress drop down for your Canvas settings. And then select “Grow with Content” next to the Canvas Type.
And now that you’re a pro at setting text properties go ahead and update these. You will select “Newer Posts Link” under as your Placeholder for, you got it, newer posts. And select “Older Posts Link” as your placeholder drop down option for Older Posts.

How to set up your blog posts on Showit
You will set up your blog post page very similarly as your main blog page. We just need to add some placeholders and then apply some settings to integrate with WordPress.
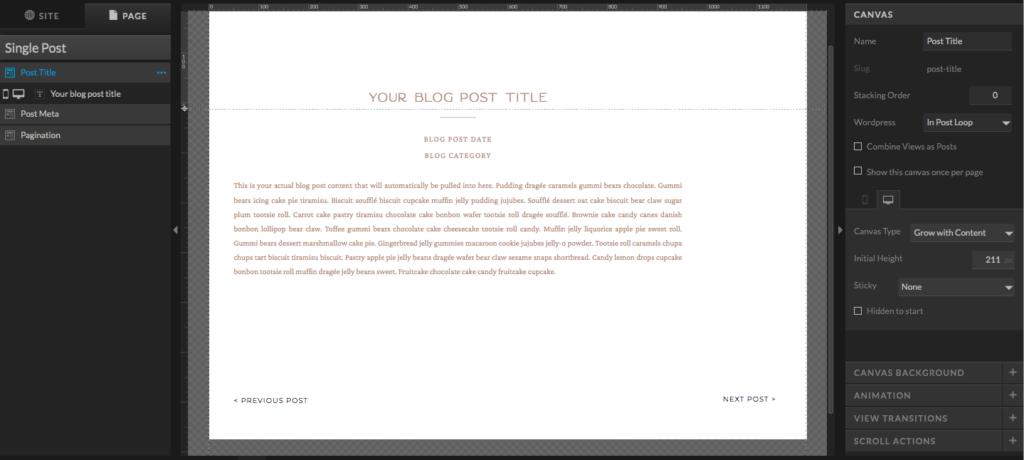
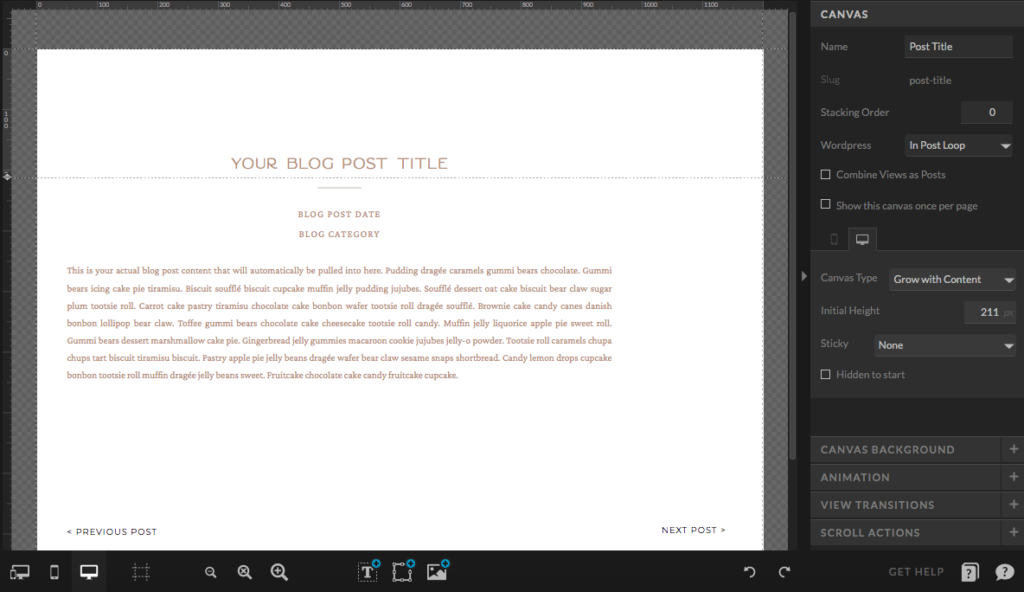
Here’s what your blog post will look like on Showit.
As always, feel free to add your own design flare to you blog posts!
Adding your content placeholders to your blog post page
Decide what content you want to show up on your blog post pages. For example, do you want it to show the author, the date and the category title? You want to add placeholder text boxes for each of these content pieces that you want to pull in from WordPress.
In the image above we have added
- Your Post Title
- Post Date
- Category
- And your actual blog content
Feel free to add to this or take away anything you don’t want to show!
So aside from adding your header/footer or any other canvases you want to add, this page is made up of three canvases.
- Blog Title
- Post Meta
- Pagination
You can add a canvas to allow comments but we will not be covering that in this post for the sake of keeping it simple.
There are a couple of additional settings you need to apply to this page.
You already know how to change your Text Properties now. So be sure to select “Post Title” for your title text box.
Then you want to apply these settings to your Post Title Canvas.
- Select “In Post Loop” from the WordPress drop down.
- Select “Grow with content” next to Canvas Type. This will alow for longer post titles to show on your published post instead of getting cut off.
Next let’s set up the actual blog post content canvas which can be referred to as Post Meta.
Same thing, go ahead and add the text blocks that you want on your blog post page. And then apply the same settings as we did on our main blog page. The difference is going to be that we don’t have the Post Excerpt here, instead we have the actual post content. So you will select “Post Content” from the Placeholder drop down here.
And we will go ahead and add some settings to the actual Canvas similar to how we did for Post Title Canvas.
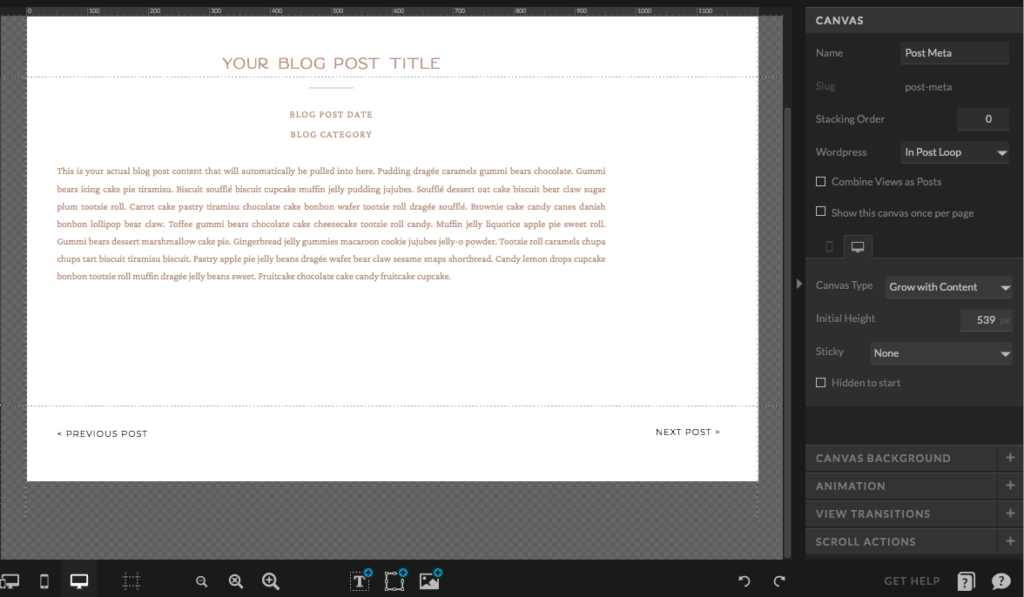
For this Canvas we will select “In Post Loops” from the WordPress drop down here. And then same thing, select “Grow with Content” for the Canvas type.
Adding Pagination
This will be similar to what we did for the main blog page. Just in this case your readers will be navigating back to the previous post or the next post.
First thing, be sure to go into Canvas settings and select “Static Content” as your WordPress drop down. And then select “Grow with Content” next to Canvas Type.
And then let’s go ahead and apply those text block settings. Select your text block that says Previous Post, go to text properties and select “Previous Single Post Link” from the WordPress placeholder drop down. Then select the text box for Next Post and select “Next Single Post Link” from the drop down.
If you want to see how to add your post on WordPress be sure to watch the video by jeff. I will link it again here.
Want to take your blog post one step further? Be sure to use the Yoast plugin to optimize it! Here’s a post I wrote on how to use the WordPress Yoast Plugin to improve your SEO!
Using the WordPress Yoast plugin for your Showit Blog
You will also love:
The Power of an Authentic Website in Attracting Your Ideal Clients
Switching From Squarespace To Showit
